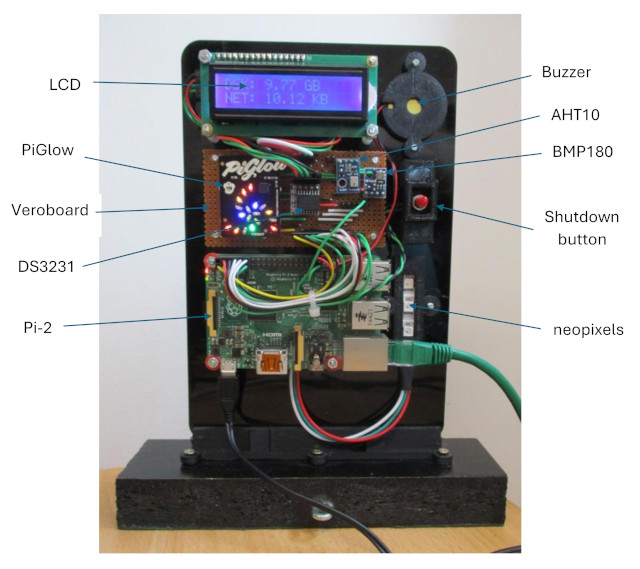
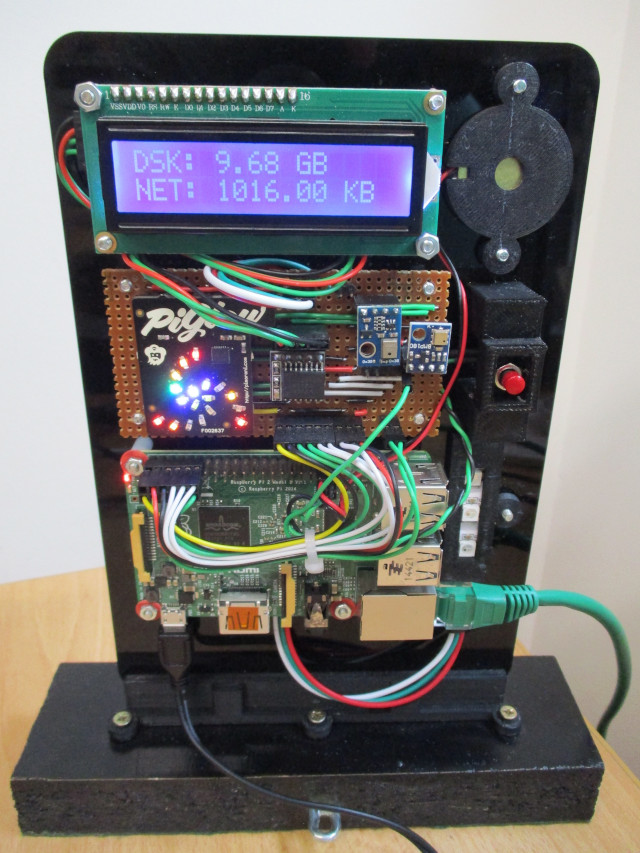
Figure 1 : Ping node
This node is just for fun, made from spare parts. Its main purpose is to beep and flash when pinged, an interact lab "toy" :). As always, the first lab in a module introduces the students to the hardware and software they will be using i.e. where stuff is stored, how to turn stuff on, how to tell if stuff is working etc. Therefore, as we have not normally had the first lecture its quite a relaxed lab i.e. i have not had the chance to confuse people yet, so some space in the timetable to have some fun, not to say that all of my labs aren't fun :).

Figure 2 : computer science departments around the world.
A useful command-line tool to test if a host is connected to a network is ping. The name comes from sonar terminology, where you send out a pulse of sound and listen for the reflected echo from an underwater object. In a network we send out a request for acknowledgement packet from one host to another and measure the round trip time (RTT) i.e. the time it takes for a packet to travel from your machine across the network, to the target host, then for it to process this packet and transmit back an acknowledgement. Note, hosts do not need to respond to a ping request, its depends on the OS, firewalls etc, just because a host doesn’t respond to a ping doesn’t mean its not there :). To use the ping command, at the command prompt enter ping and the "name" of the computer science department you wish to test :
ping www.cs.uaf.edu
This will resolve the webservers "name" to an IP address (137.229.25.25) and print this and the RTT (179ms) on the screen i.e. the time it took to ping this host, as shown in figure 3.
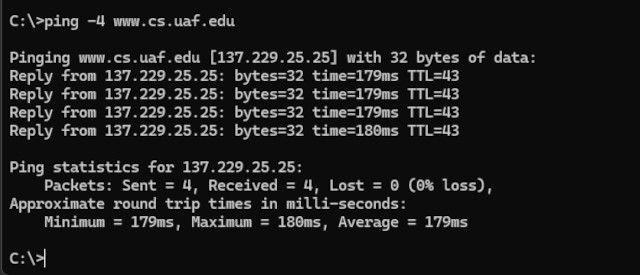
Figure 3 : computer science departments around the world.
One of the aims of this task is to show that, in general the greater the distance the greater the RTT i.e. it takes longer to ping a computer science department in Japan than one in Germany. However, to illustrate that this is only a general rule i wanted to setup a host with an artificially high latency, a host that would also do something when pinged. Hence this Frankenstein creation :).

Figure 4 : Ping node v1.0 breakdown.
This first version reuses spares and old projects from the past, so apologies i don't have the 3D or DXF design files to hand, as always i'm sure they are on a disk somewhere, but the where is lost to time. The general construction can be broken down into the key components shown in figire 4. The purpose of the middle Veroboard section is to simplify wiring of the I2C sensor and display components. More information can be found here: AHT10 and BMP180 sensors (Link), LCD display (Link) and the shutdown script /button is the same as that used on the other Pi systems.
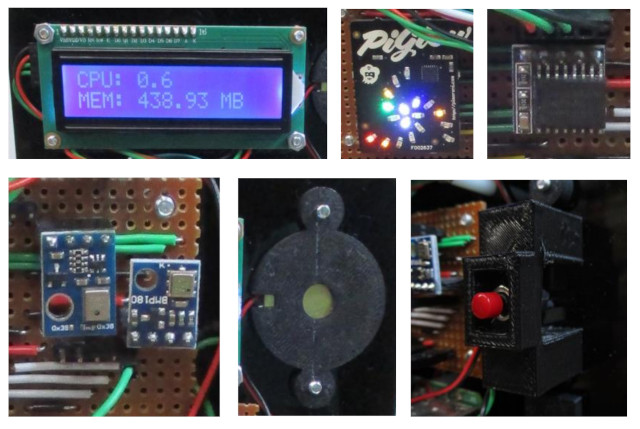
Figure 5 : LCD, PiGlow, RTC, Sensors, buzzer and shutdown button.

Figure 6 : DS3231 RTC.
This system is equipped with a DS3231 RTC (Link), not really required, but can be integrated into the system by following the instructions on this webpage: (Link), key bits listed below. Note, i find the battery life of this type of RTC is a bit limited.
sudo nano /etc/rc.local
Add the following lines before exit 0

echo ds1307 0x68 > /sys/class/i2c-adapter/i2c-1/new_device
hwclock -s
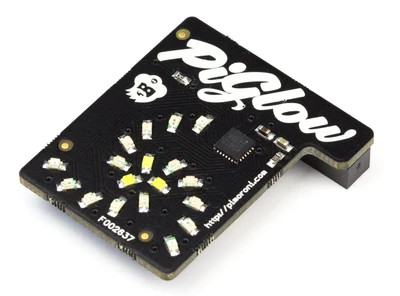
Figure 7 : PiGlow.
Confess the PiGlow also doesn't really serve a purpose, except as an i'm "alive" indicator, and it looks pretty :). This display is based on the SN3218 and 18 Channel LED Driver (Link). I found Python support available from two sources:
https://github.com/pimoroni/piglow
curl -sS https://get.pimoroni.com/piglow | bash
https://github.com/Boeeerb/PiGlow
sudo apt-get install python-smbus
sudo apt-get install python-psutil
In stalled both as the Pi will be connected to a closed network i.e. no Internet access, otherwise, not so keen to pipe an unknown script directly into Bash, hmmmmm :). In the end I went for a clock demo from Boeeerb, however, will probably update this later to something more related to the task at hand i.e. ping packet counting etc. To run this at boot updated the standard user (mike) crontab to run the script below:
@reboot /home/mike/bin/clock.sh 1>/home/mike/bin/clock.log 2>/home/mike/bin/clock.err
#!/bin/sh

DIR=`pwd`
cd /home/mike/PiGlow-master/Examples
/usr/bin/python clock.py &
cd $DIR
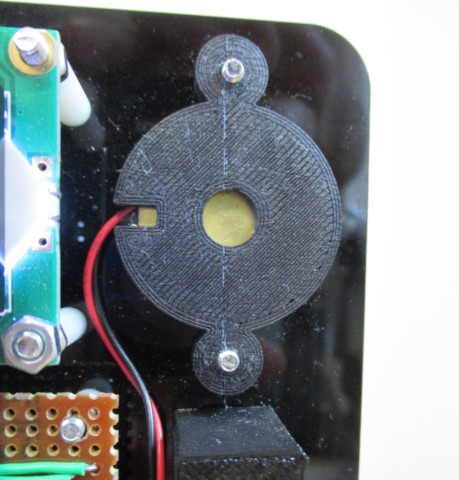
Figure 8 : Piezo Buzzer.
To signal to the user that this host has been pinged we have a piezo electric buzzer and a strip of three neopixels. The buzzer is shown in figure 8. As these devices have a very high impedance they can be directly connected across two GPIO pins i.e. to allow the voltage across the buzzer to be reversed, a "push pull" driver. Note, don't use a load speaker, as these have a very low impedance i.e. a coil of wire, therefore, would need a separate driver / audio amplifier stage. To generate a tone the Pi simply drives a square wave across the buzzer using the Python code below:
import RPi.GPIO as GPIO
import time

GPIO.setwarnings(False)
GPIO.setmode(GPIO.BCM)
GPIO.setup(20, GPIO.OUT)
GPIO.setup(26, GPIO.OUT)
print("Beep")
try:
	for i in range(0, 100):
		GPIO.output(20, GPIO.HIGH)
		GPIO.output(26, GPIO.LOW)
		time.sleep(0.0005)
		GPIO.output(20, GPIO.LOW)
		GPIO.output(26, GPIO.HIGH)
		time.sleep(0.0005)
except Exception as e:
	print("Error: " + str(e))
	pass
finally:
	GPIO.cleanup()
To prevent this code being called multiple times i.e. multiple copies running in parallel, this python codes is accessed / executed using the script below. This script first tests to see if a previous copy is still running, if it is the script exits, otherwise, it launches the python code and updates the file: beep.pid, with the new PID value of this python program.
#!/bin/sh

if test -f /home/mike/bin/beep.pid
then
  PID=`cat /home/mike/bin/beep.pid`
  if ps -p $PID > /dev/null
  then
    echo "Error: beep already running"
    exit 1
  fi
fi
sudo /usr/bin/python3 /home/mike/bin/beep.py &
echo $! > /home/mike/bin/beep.pid
This buzzer does work, but confess not the cleanest sounding buzzer i have ever heard i.e. the timing /frequency of this square wave is very dependent on CPU loading. I guess best described as cheap and cheerful :). Will probably replace later with something that makes a better "ping" sound, or maybe play a suitable wav file from that classic, the best film of all time: "The Cruel Sea" (Link).
Figure 9 : Neopixels.
I found Python support available from Adafruit: (Link), key bits listed below.
sudo pip3 install rpi_ws281x adafruit-circuitpython-neopixel

Sound must be disabled to use GPIO18. This can be done in /boot/config.txt by changing "dtparam=audio=on" to "dtparam=audio=off" and rebooting. Failing to do so can result in a segmentation fault.
To flash the neopixel strip on and off, the python code below is used. Again, to prevent multiple copies running in parallel the same PID logging launch script is used as used by the buzzer.
import board
import neopixel
import time

pixels = neopixel.NeoPixel(board.D18, 3)

pixels.fill((0, 255, 0))
time.sleep(1)
pixels.fill((0, 0, 0))
time.sleep(0.1)
Now that we have sound and light we just need to detect when this host is being pinged. To do this i used tcpdump, inspired by this stack exchange post: (Link). The script below then pulls all of these ideas / components together, as always launched by a @reboot contab entry :).
#!/bin/sh

#
while test `/usr/sbin/ifconfig | grep -c eth0` -ne 1
do
  sleep 5
done

count=0
sudo /usr/bin/tcpdump -l -n -i eth0 icmp and icmp[icmptype]=icmp-echo | grep --line-buffered request | while read line
do
  /home/mike/bin/beep.sh
  /home/mike/bin/flash.sh
  count=$((count+1))
  echo $count
  echo $count > /home/mike/bin/count
done
In addition to beeping and flashing this script also writes out the ping count to a file. This is then accessed by the python code that updated the LCD display, the specific section is listed below:
try:
  f = open("/home/mike/bin/count", "r")
  count = f.read()
  f.close()
  outputString1 = "Ping Count: "
  outputString2 = str(count).replace("\n","")
  print(outputString2)

  lcd_string(outputString1, LCD_LINE_1)
  lcd_string(outputString2, LCD_LINE_2)

  time.sleep(5) # second delay

except Exception as e:
  print("Error: " + str(e))
  pass
To see this master piece in action i recorded this short video: (Link). Finally, to add some latency to this host, such that it looks like it is located further away e.g. europe / america, i added this final script:
#!/bin/sh

while test `/usr/sbin/ifconfig | grep -c eth0` -ne 1
do
  sleep 5
done
sudo /usr/sbin/tc qdisc add dev eth0 root netem delay 60ms
WORK IN PROGRESS

This work is licensed under a Creative Commons Attribution-NonCommercial-NoDerivatives 4.0 International License.
Contact email: mike@simplecpudesign.com